A lot of the pictures that you find online or take with your own camera will tend to be rotated in the portrait or landscape orientation, which you might not find out until you are using it in an application. Luckily you can rotate a desktop picture in Windows with the help of the Microsoft Paint application that is already installed on your computer.
How to Turn Your Windows Desktop Picture
Our guide continues below with additional information on how to rotate desktop background pictures in Microsoft Windows 7, including pictures of these steps. There are several changes that many Windows 7 users will make to personalize their computers, and one of those is changing the background picture. You can use almost any image in that location, and it’s possible that you will use one from your own picture archive. But pictures taken with cell phones or digital camera have a tendency to display on a computer with the incorrect rotation, which you might find to be the case with your current selection. Fortunately, you can rotate your desktop background image using the default Microsoft Paint program that is already on your computer. You can read our resize photo in Paint tutorial if you would like to start using Microsoft’s image editing program to make changes to your other pictures as well.
How to Rotate Wallpaper in Windows 7 (Guide with Pictures)
The steps in this guide will assume that you already have a desktop background picture on your computer, but that you wish to rotate the one that is appearing there. We will be using Microsoft Paint to perform the rotation. This process will not require you to create new copies of the existing picture. We will simply be opening the picture in Paint, rotating it, then saving it.
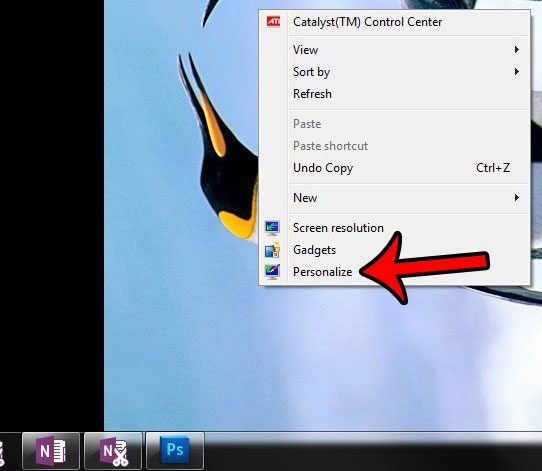
Step 1: Right-click on your Windows 7 desktop, then click the Personalize option.
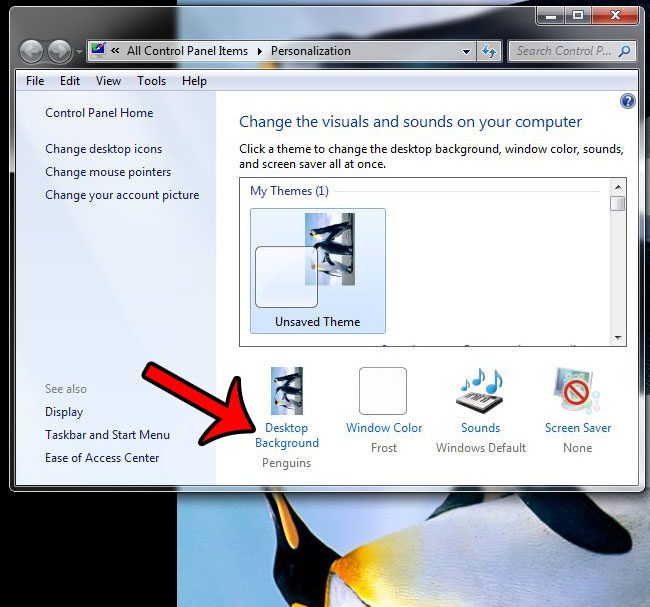
Step 2: Click the Desktop Background link at the bottom of the window.
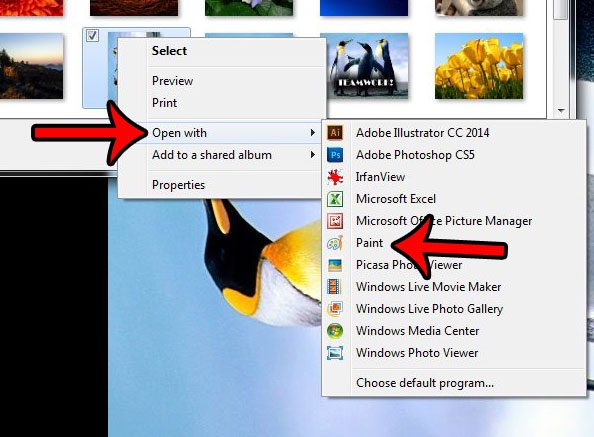
Step 3: Right-click on the selected picture (it should have a check mark next to it), click Open with, then click Paint.
Step 4: Click the Rotate button, then click the rotation option that will put your picture in the desired orientation.
In the case of the example image below, that is the Rotate right 90 option.
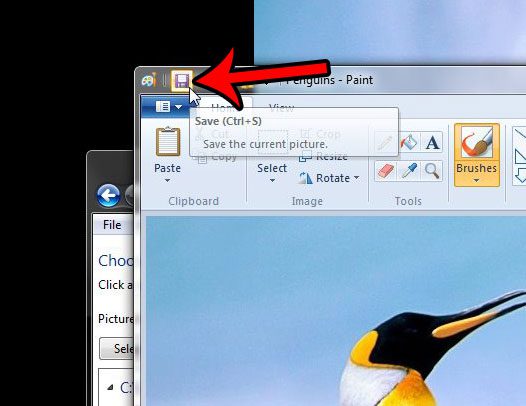
Step 5: Click the Save icon at the top of the window.
Your desktop background picture should now be at the desired rotation. Now that you’ve rotated your desktop background picture, you might want to change the size of it. Read more about adjusting background sizes in Windows 7.
Additional Sources
After receiving his Bachelor’s and Master’s degrees in Computer Science he spent several years working in IT management for small businesses. However, he now works full time writing content online and creating websites. His main writing topics include iPhones, Microsoft Office, Google Apps, Android, and Photoshop, but he has also written about many other tech topics as well. Read his full bio here.
You may opt out at any time. Read our Privacy Policy