Fortunately the row height is editable in Google Sheets, and you can even assign a manual value to that height. Our guide below will show you how to either enter a specific pixel value for the height, or how you can use a handle on the row number to visually set the height of the row.
How to Increase Row Height in Google Sheets
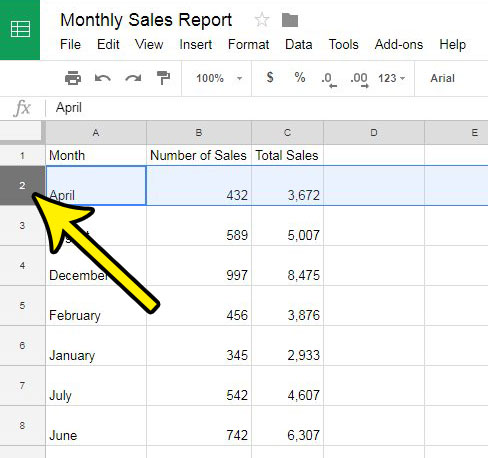
The steps in this article are going to show you how to change the height of a row in Google Sheets. While this guide is specifically going to show you how to change the height of a single row, you can apply the same method to multiple rows by selecting multiple rows instead of a single row in step 2. Step 1: Sign into your Google Drive at https://drive.google.com/drive/my-drive and double-click the file containing the row for which you want to adjust the height. Step 2: Click the row number at the left of the spreadsheet to select that row. You can select multiple rows by holding down the Ctrl key on your keyboard and clicking each row. Note that this will force you to make each row the same height. If you want to set different heights for different rows, then you need to do so individually.
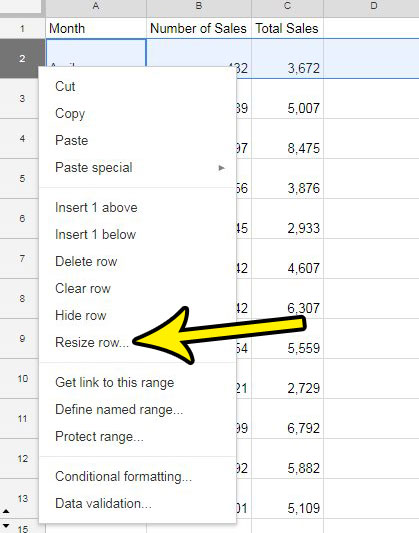
Step 3: Right-click a selected row, then choose the Resize row option.
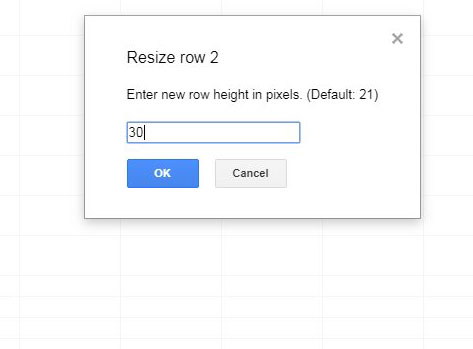
Step 4: Enter the desired height into the field at the center of the window, then click the OK button.
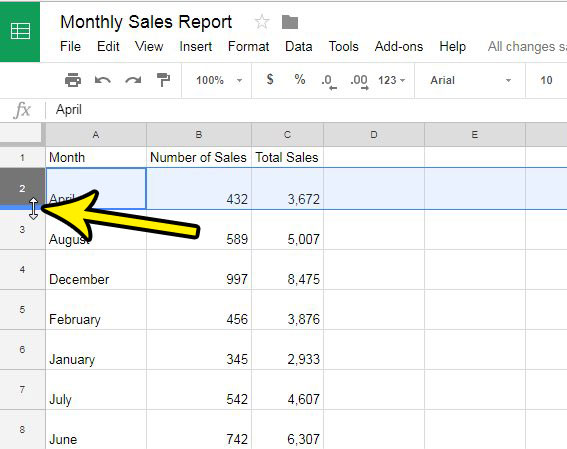
If you aren’t interested in setting a precise row height, you can change the row height by clicking on the bottom border of the row number and dragging it up or down.
Do you have an extra column in your spreadsheet that you don’t need anymore? Find out how to delete a column in Google Sheets and clean up any empty columns or columns that contain unnecessary data. He specializes in writing content about iPhones, Android devices, Microsoft Office, and many other popular applications and devices. Read his full bio here.


