Pictures taken with a camera are rarely perfect for what you need. There are often extraneous elements in the image that were not intended to be part of the picture, which requires you to use a crop tool in an image editing program to remove them. Other programs that work with pictures, such as Microsoft Excel 2013, also include tools that allow you to crop a picture. So if you have inserted a picture in your worksheet in Excel 2013, then you can read our guide below and learn how to crop that picture directly within Excel.
How to Crop a Picture in Excel 2013
Our tutorial continues below with more on cropping images in Excel, including pictures of these steps.
Cropping a Picture in an Excel 2013 Worksheet (Guide with Pictures)
The steps in this article will assume that you have already added a picture to your worksheet and that you would like to crop that picture to remove some of the unneeded elements in the image. Note that this will only crop the copy of the picture that is in your worksheet. It will not crop the original version of the picture that is saved somewhere on your computer.
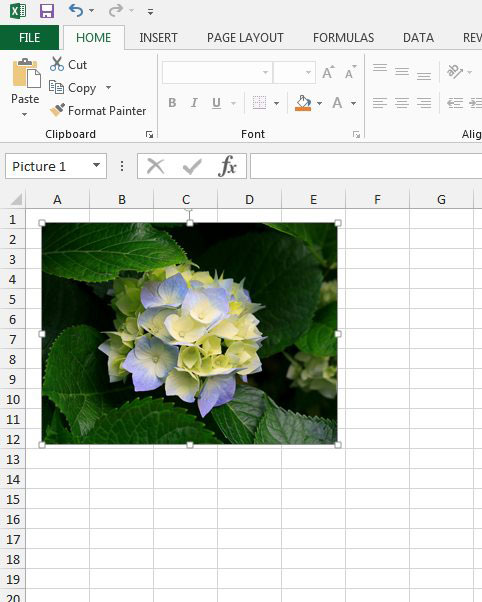
Step 1: Open the Excel file containing the picture that you want to crop.
Step 2: Click the picture to select it.
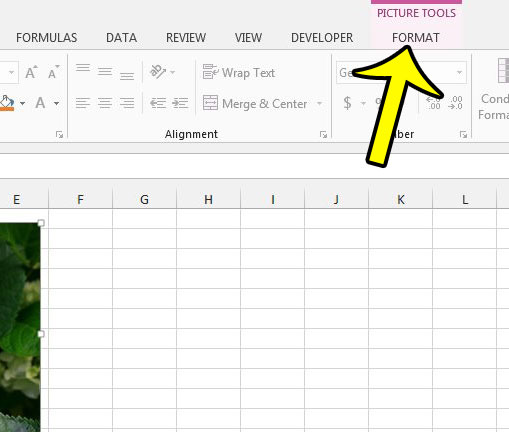
Step 3: Click the Format tab at the top of the window under Picture Tools.
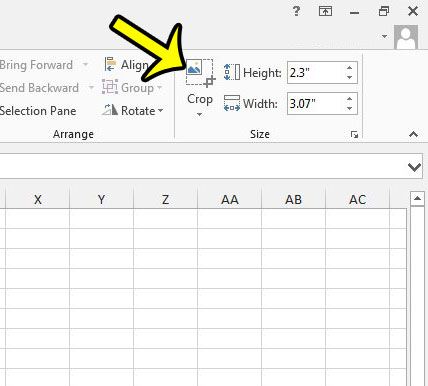
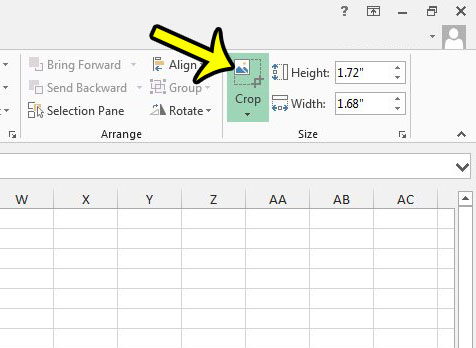
Step 4: Click the Crop button in the Size section of the ribbon.
It is the section at the right end of the ribbon. Note that this Size group also includes options for adjusting the height and width of the image as well. If you want to change the picture size you simply need to click inside the width and height boxes and enter new values. Note that Excel will try and keep the original picture aspect ratio.
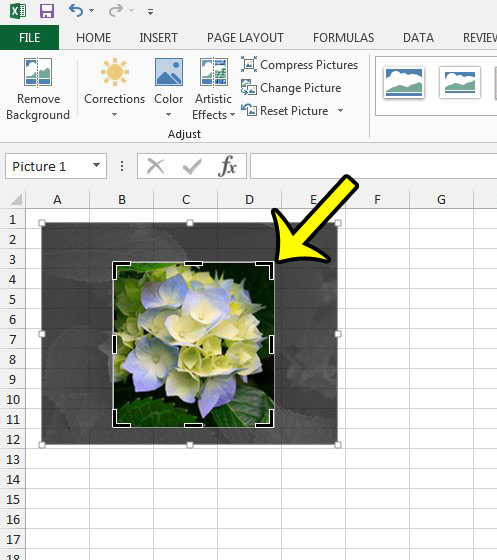
Step 5: Drag the borders on the image until they are surrounding the part of the picture that you want to keep.
Click the Crop button in the Size section of the ribbon again to exit the cropping tool and apply your changes. Our tutorial continues below with more discussion on cropping and working with images in Microsoft Excel.
How Do I Get to the Crop Tool on the Picture Tools Format Tab?
In the guide above we discuss a tool that lets you trim parts of your images using a crop handle system that lets you crop rectangle versions of your images. However, the tab where you go to access this cropping tool won’t appear unless you already have a picture in your spreadsheet, and that picture is selected. So, to be able to view the various formatting options for your picture file you simply need to click on the image first.
More Information on How to Crop Image in Excel 2013
In the ribbon group to the left of the Size one where the Crop button is there are tools that let you change the layer of the image, as well as rotate it. In addition to these tolls, the Layout tab of Excel’s Picture Tools menu also offers options for making adjustments, coloring the photo, or making corrections. While there is a lot that you can do to edit an image in Excel, you may find that there is still more that you need to accomplish. If so then you will likely need to utilize a third-party image-editing tool like Microsoft Paint or Adobe Photoshop. You can adjust the crop area of your picture by dragging the center cropping handle and the corner cropping handle until the desired area of the picture is surrounded. These cropping handles move independently which can be useful if you have a specific shape in mind. But if you want to crop equally around the picture so that the shape’s boundaries use a common aspect ratio, then you can do so by holding down the Ctrl key on your keyboard and dragging the boundaries. This way Excel crops each side at the same time. Do you only need to print part of your worksheet, or are you working with a worksheet where only some of the data is printing? Both of these issues can be resolved by working with the print area. Learn how to set a print area in Excel 2013 so that you are able to print the part of your spreadsheet that you need.
Additional Reading
He specializes in writing content about iPhones, Android devices, Microsoft Office, and many other popular applications and devices. Read his full bio here.
