Fortunately this is a setting that you can change to anything that you would like. Our guide below will show you where to find and change the display name for your emails in Outlook 2013.
Changing the Send Name for Your Emails in Outlook 2013
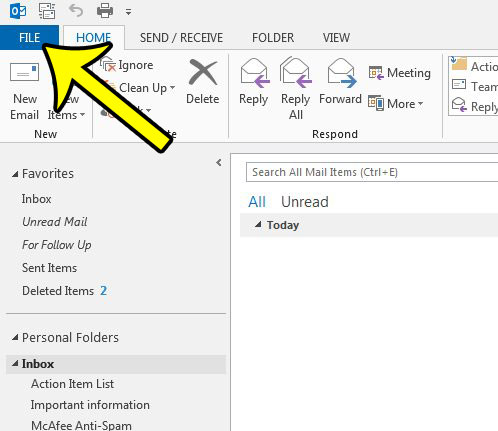
The steps below are going to change the name that appears in your recipient’s inboxes for the messages that you send through Outlook. It will not change the email address that they see. Step 1: Open Outlook 2013. Step 2: Click the File tab at the top-left corner of the window.
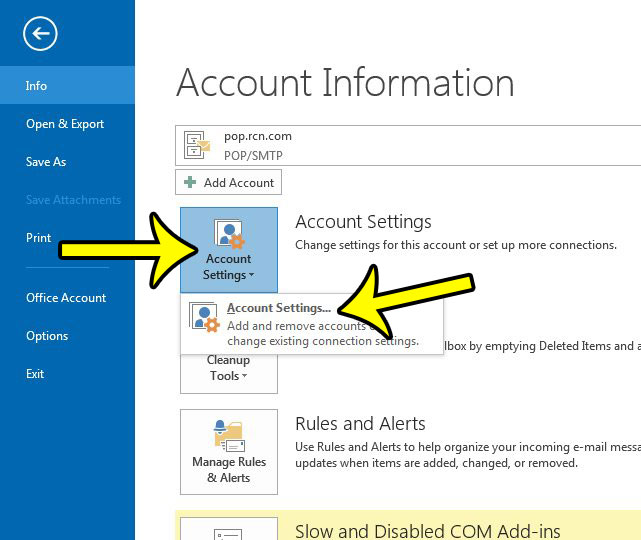
Step 3: Click the Account Settings button, then click Account Settings again.
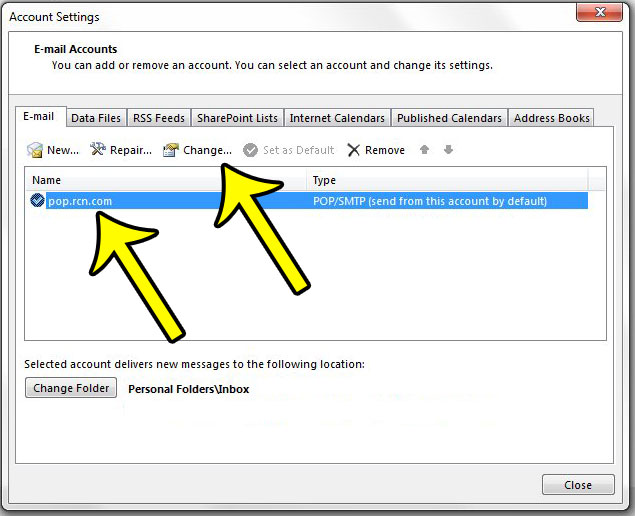
Step 4: Select your email account from the list, then click the Change button.
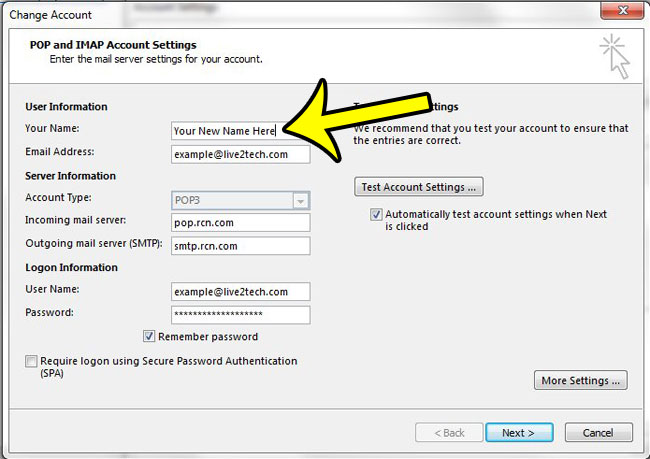
Step 5: Click inside the Your Name field, delete the information, then enter the name that you would like to use as your “Sent from” name in Outlook 2013. You can then click the Next button at the bottom of the window, then the Finish button to complete the process.
One of the biggest complaints that I had when I started using Outlook 2013 was how long it took for Outlook to check for new messages. Fortunately this is something that you can change by adjusting the send and receive frequency. You can choose to have Outlook check for new emails as often as you would like. You could even choose to have it check every minute, if that is your preference. He specializes in writing content about iPhones, Android devices, Microsoft Office, and many other popular applications and devices. Read his full bio here.


