By learning how to adjust your column order in Excel you can quickly resolve issues that might make it more difficult for people to understand the data in your spreadsheet. Excel’s ability to let you interact with entire columns of data at one time can help immensely when you are reorganizing the data in your spreadsheets, and can make it much simpler to fix mistakes caused by an initial spreadsheet layout that you have discovered is no longer ideal. The organization of data in Microsoft Excel 2010 can often be as important as the actual data itself. This is especially true when you are creating reports that need to be read by colleagues and supervisors. So occasionally you might find that some data is not in the best location, and would be more useful if it were moved. If this data is an entire column, then you can take advantage of a built-in feature in Excel 2010 that allows you to move an entire column at once, then put it in a different location.
How to Put a Column in a Different Location in Excel 2010?
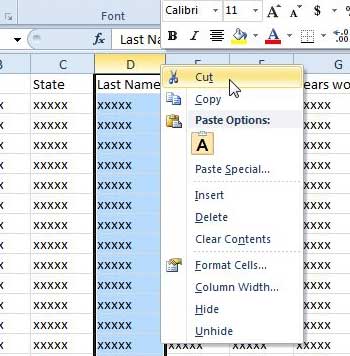
This tutorial can be summarized as changing column order in Excel by cutting and pasting. But whereas you may have tried to do a copy and paste to move your data before, this will actually result in correctly organized columns without any unnecessary empty cells. Excel will let you cut data from a location and paste it into another one, but it will also let you cut groups of data and insert them into a new location. This is a minor but important distinction, as it makes moving a column in Excel a little cleaner. So follow the steps below to learn how to relocate a column in Excel 2010. Step 1: Open the spreadsheet that you want to edit in Excel 2010. Step 2: Right-click the column header (the letter at the top of the column) that you want to move, then click the Cut option.
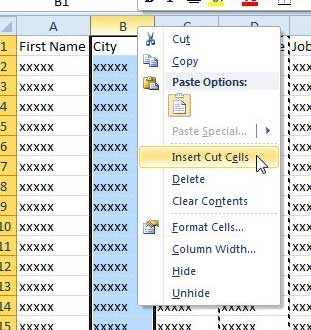
Step 3: Right-click the column header to the right of where you want the column to be moved, then click the Insert Cut Cells option. For example, I want to move my cut column so that it is directly to the right of column A, so I have right-clicked column B.
Summary – How to change column location in Excel
You can move multiple columns in Excel by clicking the leftmost column that you wish to move, then holding the Shift key on your keyboard and clicking the rightmost column that you wish to move. This will select both of those columns, as well as all of the columns between them. You can then follow the same method of cutting the selected columns and inserting those cut cells that you used in the guide above to move a single column. If you are looking for a way to insert a blank column into an existing spreadsheet, you can read this article. After receiving his Bachelor’s and Master’s degrees in Computer Science he spent several years working in IT management for small businesses. However, he now works full time writing content online and creating websites. His main writing topics include iPhones, Microsoft Office, Google Apps, Android, and Photoshop, but he has also written about many other tech topics as well. Read his full bio here.
You may opt out at any time. Read our Privacy Policy